- Published on
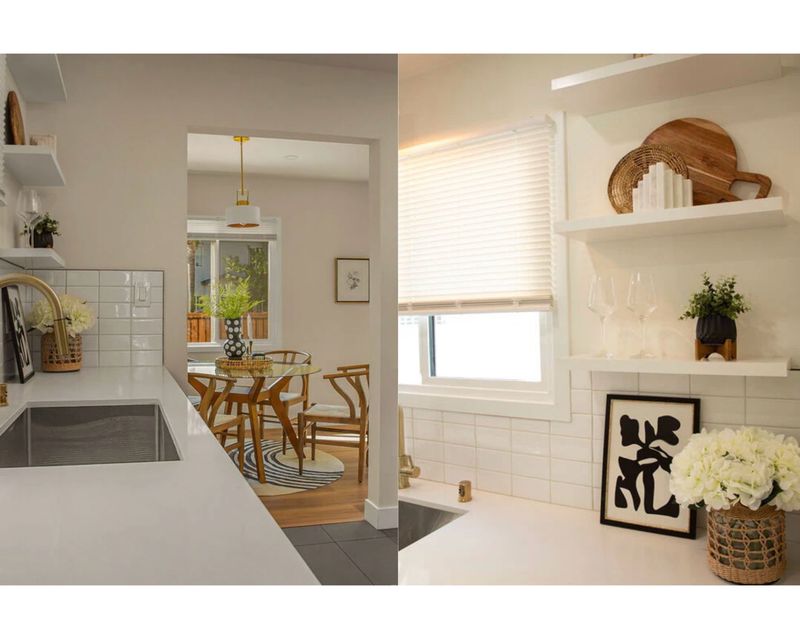
If your kitchen works but just feels tired, you probably don't need a full remodel. These kitchen refresh ideas are the five updates I suggest first to clients who want their kitchen to feel new again without tearing out cabinets or living with a construction zone for months. Most can be done in a weekend or two, and they all build on what you already have.


- Published on
Are you tired of coming home to a messy and cluttered house? Don't worry, there's hope! This House Keeping Guide will help you clean and organize your home in just 7 easy steps. With these simple tips, you'll be able to quickly tackle any mess or clutter that has accumulated over time and have a space that is neat, tidy, and inviting. Read on for our best advice!


Step 1: Declutter Your Home
The first step in cleaning and organizing your home is to declutter the space. Start by gathering all the items that are out of place or not being used anymore. You can donate them, recycle them, or throw them away – but make sure to get rid of anything that is cluttering up your home. This will make for a much more organized and inviting space.
Step 2: Create Storage Solutions
Once everything has been decluttered, it's time to get creative with storage solutions. Invest in additional shelves or bins that you can use to store items away neatly. Make sure to label them so that you know where everything should go when it’s not being used. This will help keep the clutter at bay and make cleaning up much easier!
Step 3: Do A Deep Clean
Now that all of the mess is out of the way, it’s time to give your home a deep clean. Start with carpet cleaning, dusting surfaces, and wiping down counters. Pay special attention to those hard-to-reach areas that don’t get cleaned often.
Step 4: Sort Through Clothes and Shoes
Go through your closet and drawers to sort out any clothes or shoes that you no longer wear or need. Donate them, sell them online, or give them away so they are not just taking up precious space in your home. You'll find it easier to keep a neat wardrobe when everything has its place!
Step 5: Organize Kitchen Pantry and Refrigerator
The next step is to organize your kitchen pantry and refrigerator. Start by checking expiration dates on items so that anything that's expired can be thrown away. Then, sort the items into categories like canned goods, dry goods, etc. to make them easier to find later.
Step 6: Utilize Vertical Space
Many people are unaware of the potential of using vertical space to store items. Consider installing shelving units on unused walls or stacking containers in cupboards and drawers so you can maximize storage without taking up too much floor space.
Step 7: Establish Cleaning Routines
Finally, it's important to establish a regular cleaning routine so your home stays neat and tidy. Set aside time each week for dusting, vacuuming, wiping down surfaces, and other chores that need doing. This will help keep your home looking spick-and-span!
There You Go
Follow these 7 simple steps, and you'll be able to keep your home clean and organized in no time. Don't let the mess get you down – with a little bit of effort, you can have a neat and tidy space that looks great and is easy to maintain.
- Published on


In my last post I shared how I create mood boards and why I still use them after more than 16 years. A mood board answers one big question: what should this room feel like?
But there's another design tool I consider just as important, maybe even more important, before you buy a single thing. The furniture layout.
I've been drawing rooms for as long as I can remember. Even as a little girl I loved sketching houses, floor plans and all the different ways a room could work. What fits here? What happens if the sofa moves there? Could the bed go on another wall? That habit became one of the most useful tools I use as a designer.
This post is about why I always draw the room first, and how a simple layout can save you from expensive mistakes.
- Published on


Picture a room where everything already feels like it belongs: the sofa, the paint, the rug and the lighting all telling the same calm, pulled-together story. A mood board lets you see that room before you spend a dollar.
Mood boards have been part of my design process for more than 16 years. I recently found one of my early ones from 2010, from the days when "e-decorating" and "virtual design" were first getting popular. (Still do those too!)
I create mine in Apple Pages and keep them on my iPhone and iPad, so I can pull one up while I'm sourcing furniture, comparing finishes or shopping.
In this post I show you exactly how I build one, and how you can make your own to find your style and set a clear direction for your room.
- Published on


Picture a laundry room you actually like walking into: calm, warm, custom-feeling, with a place for everything. Most laundry rooms are an afterthought, a narrow space you rush in and out of. This one got the same care as the rest of the house.
For this 1920s Spanish Revival renovation, I wanted the laundry room to feel intentional: connected to the character of the home, but updated and functional. The house has beautiful terra cotta floors and warm architectural details, so instead of competing with that richness, I took a softer contemporary transitional approach with layered neutrals, natural textures and custom built-in storage.
The goal was simple: a utility room that feels custom, elevated and collected, not purely utilitarian. It started with the materials, including light oak cabinetry, a darker stone countertop and raw, handmade-style tile with imperfect edges.
Here's how it all came together, selection by selection.
- Published on


Picture a bathroom so tight you could barely turn around at the sink, now a little jewel box: patterned concrete tile underfoot, a custom floating vanity with room to stand, and a shower that finally has breathing room. Same footprint, a completely different feeling every morning. It belongs to a 1920s Spanish Revival home a client asked me to update while respecting its original character.
This tiny bathroom off the main bedroom was one of the first spaces I designed. We extended the shower into a neighboring closet to make room for a larger vanity, and because the sink and toilet sat so close together, I off-centered the sink so she has more space to stand.
In this post I share the before and after floor plans, the custom floating vanity, the concept board, and how I chose the patterned concrete tile that makes this small bathroom truly stand out.
- Published on


Picture a small basement bathroom that went from "fine" to the room guests ask about: soft natural wood, brass, a calm palette that feels like a spa tucked under a 1920s Spanish Revival home. That is where this one ended up, and it almost didn't.
Much of the design for this renovation was finished months ago and construction was well underway when my client emailed me in June wanting to completely redesign one of the bathrooms we had long since finalized. The original plan kept the Spanish look that runs through the rest of the house, with a few more masculine touches for her husband, like matte black hardware. With her new inspiration photos in hand, we took it from a contemporary Spanish style to a softer, more on-trend natural style.
Here's a look at one bathroom, two ways: the original design, the redesign, and the thinking behind every selection.
- Published on


Picture the day your remodel is finally done: the dust is gone, every finish is one you chose on purpose, and the whole house feels like it was always meant to look this way. That's the reward. Getting there is the hard part: so many decisions, and so much hoping you don't make a costly mistake.
As an interior designer, I live through every remodel right alongside my clients, so I know exactly where things go sideways.
My biggest piece of advice? Never rush. Give yourself real planning time, time to think decisions through, plenty of time for purchasing, and room for the mishaps that always happen (long lead times, broken items, lost deliveries). Things take longer and cost more than you expect, so plan for it.
In this post I walk through my step-by-step process for approaching any design project, starting with defining a style.
- Published on


After more than three decades in interior design, I decided to start something new: writing about design, out loud, for you. That's where Your Design Guide began. My goal is simple. I want to share how the design process actually works, give you practical guides and honest tips, and help you with your own projects from wherever you are.
Before we dive into rooms and renovations, I thought you'd enjoy a few fun facts about me. I decided I wanted to be "a interior disger" like my mom when I was in the third grade. I've been drawing floor plans since I was little, and before that I built rooms out of Play-Doh. Some things never change.
This first post is the story of how I got here, what I love about this work, and what you can expect from the guide.
- Published on


Image credit Unsplash
Starting a renovation project is super exciting – it's your first step toward making your home exactly what you've always dreamed of. While everyone loves dreaming up mood boards and picking out material samples, there's a less glamorous but super important part: getting the site ready. This behind-the-scenes work truly sets the stage for a smooth, successful transformation. Taking the time to prepare your space *before* the first hammer swings can save you time, money, and a lot of headaches later. It helps keep your home safe, lets your contractors work efficiently, and keeps the whole project on track.
First Things First: Protecting Your Space
Before demolition starts, your main goal is to protect the parts of your home that *aren't* being renovated. Begin by clearing out all furniture, artwork, rugs, and decor from the work area and any nearby spots. For things you can't move, like a heavy sofa or built-in cabinets, cover them really well with heavy-duty plastic sheeting and tape.
Don't forget about your floors! Even if you're planning to replace them, it's smart to protect the subfloor underneath. For floors you want to keep, use tough protection like Ram Board or thick cardboard, and tape all seams so dust and debris can't sneak through. Hang plastic sheeting over doorways to create a dust barrier, and shield vulnerable corners and baseboards from accidental bumps and scratches.
Planning for Debris and Waste
No matter how big or small, a renovation creates a surprising amount of trash. From old drywall and flooring to all the packaging from new materials, you'll need a plan to handle it all. A few trash bags just won't cut it for anything more than a tiny paint job. For kitchen remodels, bathroom gut-jobs, or any project with demolition, renting a dumpster is definitely your best bet. Thinking about this early is key to creating a site waste management plan that keeps your property tidy and safe.
When you're choosing a dumpster, consider how big your project is. Many homeowners find it helpful to review the different options; for example, the Red Dog website provides clear info on dumpster sizes and rental periods, which can help you plan your budget. Booking your dumpster ahead of time means it'll arrive when you need it, preventing piles of debris from building up and becoming a hazard in your yard or driveway.
Setting Up a Staging Area
An organized project runs smoothly. Set aside a specific spot, like your garage or a spare room, to be the project's main hub. This is where you can store new materials, tools, and supplies neatly. Keeping everything in one place prevents items from getting lost or damaged and keeps your home from feeling like a chaotic construction zone.
In this staging area, you can unbox new fixtures, assemble flat-pack furniture, or even lay out tiles to check for patterns and flaws before installation. This simple step helps you catch material problems early, long before they cause delays during installation. Plus, it gives your contractors a clear, dedicated space to work from, which they'll really appreciate.
Clearing the Path for Your Crew
Your contractors need clear and safe access to the work area. Before they even arrive, make sure there's an unobstructed path from your home's entry point right to the renovation zone. This might mean clearing a hallway, keeping pets in another part of the house, or even setting up a specific entrance for the crew to use. A clear path is crucial for safety and efficient work.
Good construction site preparation also means thinking about the practical stuff. Where will contractors park their vehicles? Is there a designated spot for a portable toilet if it's a big project? Is there easy access to electrical outlets and a water source? Answering these questions beforehand shows you respect your crew's time and helps the project kick off on the right foot.
Don't Forget About Dust and Air Quality
Renovation dust is super fine; it gets everywhere, and it seems to sneak into every nook and cranny. Sealing off the work area with plastic sheeting is a great start, but you can do even more. Cover any HVAC vents in the renovation zone to stop dust from circulating throughout your home's system. You might also want to put an old towel at the bottom of the door to the work zone for an extra layer of protection.
For bigger projects, especially those involving sanding drywall, renting an air scrubber can make a huge difference. These machines filter the air, catching tiny dust particles before they settle on your belongings or affect your home's air quality. This small investment can save you hours of cleaning later and make living in your home much more pleasant during the renovation.
Planning these practical details means your renovation will be less about stress and more about the excitement of watching your vision come to life. A well-prepared site is truly the foundation for a beautifully finished space.